Smoking ribs on a gas grill is a challenge, but we love a good challenge, so read on for our step-by-step guide.
Serving up ribs at a backyard barbecue during the summer is one of the true joys of being a pitmaster. Everyone loves ribs (even if they don’t they sure do eat a lot of them when the platter is sitting out), and when they’re cooked right they will bring the masses to their knees. One of the problems we run into from time to time is a customer that has a nice gas grill but no smoker and doesn’t have the budget or want to spend the money to buy a standalone pit. If that’s you, don’t worry, we’ll have you smoking up amazing ribs in no time flat.
What You’ll Need

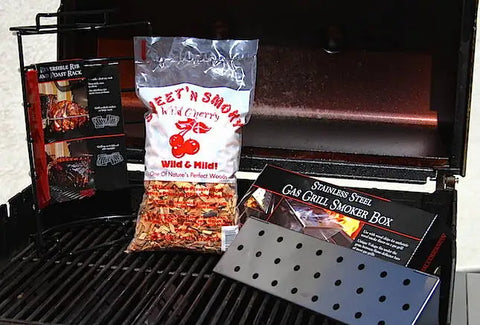
Step One: Insert the stainless smoker box under the grills grates on one side of the pit, setting it on the flame deflectors (sometimes called flavorizer bars) that cover the burners, fill it with wood chips, pour one cup of water on the chips and close the hinged lid of the box.
Do not soak the chips, the idea here is to keep the chips from catching fire, not to soak them until they smolder. We want to produce thin blue smoke, so they will need to burn up fairly quickly. Simply refill the wood chips as needed during the cook. What’s most important is getting smoke into the ribs for the first two hours of the cook.
Close the lid on the smoker box and put the grate back in place (or leave it off to make refilling easy). Ignite the burner that your smoker box is resting on, put your rib rack in place, and close the lid of your grill. Do not ignite any other burners. We do not want direct heat under the ribs. The single burner that is burning the wood chips will provide the chamber with the perfect amount of heat to cook the ribs.

Step Two: While the grill is heating up you will prep your ribs (we cooked three racks of baby backs for this cook) by trimming off any excess fat and pulling the papery membrane from the bone side of the ribs. Apply a small amount of yellow mustard to the ribs and rub with your favorite rib rub. We used three different rubs for this cook; Code 3 Spices 5-0 Rub, 3 Eyz BBQ Rub and Smokin’ Guns BBQ Original Hot Rub.

Your grill will now be nice and hot. Take a little time and adjust the burner so that your grill is holding steady between 225°F and 250°F. Once you get the heat where you want it, place your ribs on your rib rack and close the grill lid. This is where it’s good to have something else to do because your grill won’t need much help to maintain heat or produce smoke. After an hour come back and check on the wood chips. If they need to be refilled, do so. Don’t forget to pour some water over the top, we don’t want them to catch fire and burn up too fast.

Step Three: After a couple of hours, check on the ribs and make sure your smoker box still has wood chips. If you want more smoke flavor, you can refill the box now, but if you like a more mild smoke there is no need to worry about it. At this point in the cook, the rib meat should start to pull away from the bone. Test for tenderness by trying to move one of the bones toward the center of a rack. It will still be tough to move at this point, but after a couple more hours it will start to swivel in place and the rack of ribs will no longer feel springy.
You may also like: Competition Style St. Louis Spare Ribs
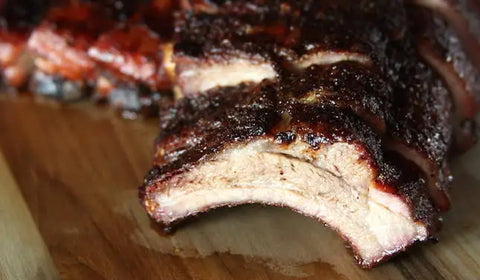
This is a sign that the connective tissue in the meat has started to break down. Once the bone swivels freely and the meat around the bone stays in place your ribs are done. Pull them off and let them rest for a half hour before slicing them up. This will make slicing much easier as the juice in the ribs will redistribute back into the meat from the surface.

Step Four: Slice the ribs with a nice sharp knife. Having a Victorinox 12″ Granton Edge Slicer will make this especially easy as the knife will move through the ribs like butter and the granton edge will release the meat without tearing your bark apart on each cut. Serve these ribs with your favorite barbecue sauce like Firebug Grill’n Sauce Hot. Enjoy!
